Installing air suspension kits for vehicles isn’t as difficult as you may think. With all of the parts needed included in each kit, converting your suspension into an air suspension is quick and easy. And to help you get started, here are seven easy steps for installing your own air suspension kit:
1. Review your kit. Before you can get started with the actual installation process, you’ll need to take a look at your air suspension kit and manual. Make sure that all of the necessary parts are included. If some are missing, call the manufacturer.
2. Lift your car and remove the wheels. Using a hoist or jack stands, raise your car high enough off the ground so you can work comfortably. Then remove the wheels.
3. Build the air spring assembly. Check your kit’s manual to see if you need to build an air spring assembly. If not, proceed to Step 4.
Depending on the air suspension kit you choose, you may have to build an air spring assembly. To create an air spring assembly, simply place the upper and lower mounting brackets over the air spring and secure the bolts and nuts included.
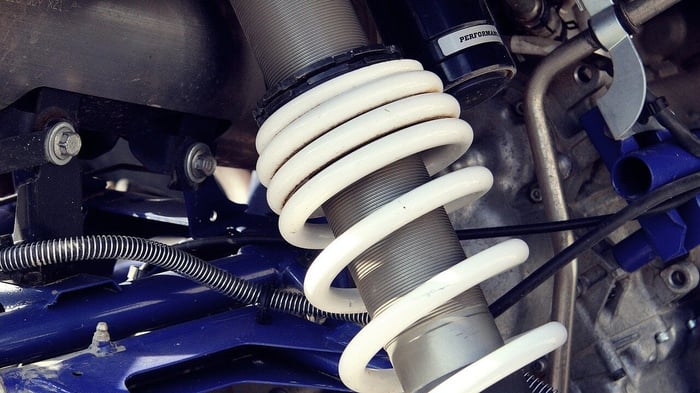
4. Install assembly or springs. After that, you can start installing the air spring assembly or air springs on your vehicle. Those with air spring assemblies can secure the part to the frame by following the directions in the kit’s manual.
Those installing an air spring cylinder must remove the cap and compress the object before installing. Once the air spring cylinder is flat, replace the cap to help it retain its shape. Next, insert the part into your car’s coil spring. Then attach the hose to the air spring cylinder using the directions in your kit’s manual.
5. Connect air lines to Schrader valve. Once the air spring parts are properly installed, connect the air line to the Schrader valve included in the kit and mount it to the car away from moving parts as well as sharp and hot objects. You can also connect the air line to an onboard compressor system if installed.
6. Inspect and inflate the springs. Slowly inflate the springs to the specifications stated in the instruction manual. During this time, you should also check for leaks and any other issues.
7. Adjust and Drive. If there are no leaks in the system, then you’re ready to adjust the air spring to your desired height ride and drive off.
Questions? Contact The Suspension Experts
As you can see, installing your own air suspension kit is easy when you follow the steps above. Just make sure that you consult your kit’s instruction manual throughout the process to ensure that everything is installed properly.
If you have questions or need more information about air suspension systems or how to install your own, call Strutmasters at 888-218-9344 or contact us online today.